0. img위에 annotations 시각화
1. Custom Augmentation
2. makeing validset
3. CVAT 사용법 (labeling tool)
4. 이어서 학습하기, (pth file 사용법)
5. 공공행정문서ocr (aihub) 사용법 (coco ↔ ufo)
6. ocr데이터, 금융 및 물류 (aihub) 사용법 (coco ↔ ufo)
7. CORD (clova, huggingface) 사용법 (coco ↔ ufo)
8. json file, concat방법
9. numpy, albumentation 버전에 따른 훈련속도 차이 변화 12분 → 3분
1. Custom Augmentation
이번 대회에서 가장 중요한 점은 train set과 test set의 양상이 아주 다르다는 것이다
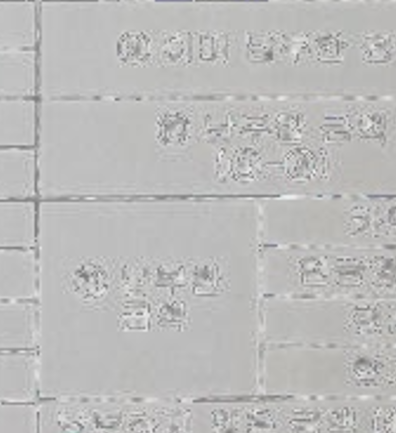
이런 식으로 test set에는 train set에서 다양한 변형을 집어넣어놨다.
저 이미지의 경우에는...참...왜곡을 많이도 해놨다는 생각을 들게했다.
내가 이번 대회에서 높은 점수를 받지 못한 이유는 저런 augmentation을 구현하거나 모듈을 찾는 데에 너무 많은 시간을 투자해버린 것이다. super resolution이나 ensamble로 고득점을 충분히 받을 여지가 있었다.
하지만 이번 대회의 취지에 집중해서 외부데이터 이용과 augmentation 구현, 시간을 아끼는 훈련법을 기록해뒀다.
나는 크게,
1.1 : 002723.jpg같은 이미지를 만드는 move_pepper_noise 함수,
1.2 : 이미지 전체에 점을 뿌리는 pepper_noise,
1.3 : 점 노이즈의 군집을 만든 spot_pepper_noise,
1.4 : 이미지를 흐리게 만드는 GausianBlur
1.5 : 밝기와 대비를 조절하여 흐린 이미지를 만드는 RandomBrightnessContrast를 사용했다.
그리고 몇 가지의 이미지는 이미 흐린 상태였기 때문에 augmentation에서 제외하는 함수를 train.py에 포함했다.
다음의 dataset.py에 구현된 augmenation이다.
# 노이즈 정의
def resize_img(img, vertices, size):
    h, w = img.height, img.width
    ratio = size / max(h, w)
    if w > h:
        img = img.resize((size, int(h * ratio)), Image.BILINEAR)
    else:
        img = img.resize((int(w * ratio), size), Image.BILINEAR)

    if img.mode != 'RGB':
        img = img.convert('RGB')

    new_vertices = vertices * ratio
    return img, new_vertices

def move_pepper_noise(img, vertices):  # 뒷배경과 pepper 노이즈 추가
    resized_img, new_vertices = img, vertices
    # resized_img, new_vertices = resize_img(img, vertices, 2048)
    new_width, new_height = int(resized_img.size[0]*1.1), int(resized_img.size[1]*1.5) # 뒷배경 생성
    background_b = Image.new('RGB', (new_width, new_height), (255, 255, 255))
    background_f = Image.new('RGB', (new_width, new_height), (255, 255, 255))

    # 원본 이미지를 뒷배경에 추가
    max_x = new_width - resized_img.size[0]
    max_y = new_height - resized_img.size[1]
    random_x = random.randint(0, max_x)
    random_y = random.randint(0, max_y)
    background_b.paste(resized_img, (random_x, random_y))
    new_vertices[:, 0] += random_x  # bbox 위치도 수정
    new_vertices[:, 1] += random_y

    # 원하는 노이즈 pepper 추가
    num_noise_points = 60000  # 점의 개수
    noise_color = (0, 0, 0)  # 검정색

    draw = ImageDraw.Draw(background_f)
    for _ in range(num_noise_points):
        x = random.randint(0, new_width)
        y = random.randint(0, new_height)
        noise_color = (0, 0, 0)
        radius = random.randint(1, 3)
        draw.ellipse((x-radius, y-radius, x+radius, y+radius), fill=noise_color)
    background_f = background_f.filter(ImageFilter.GaussianBlur(radius=1)) # 점 blur
    result_image = Image.blend(background_b, background_f, alpha=0.1)

    return result_image, new_vertices

def pepper_noise(img, vertices): # pepper 노이즈 추가
    resized_img, new_vertices = img, vertices
    # resized_img, new_vertices = resize_img(img, vertices, 2048)
    # 원하는 노이즈 pepper 추가
    num_noise_points = 30000  # 점의 개수
    noise_color = (0, 0, 0)  # 검정색
    resized_width, resized_height = resized_img.size
    background_f = Image.new('RGB', (resized_width, resized_height), (255, 255, 255))
    draw = ImageDraw.Draw(background_f)
    for _ in range(num_noise_points):
        x = random.randint(0, resized_width)
        y = random.randint(0, resized_height)
        noise_color = (0, 0, 0)
        radius = random.randint(1, 5)
        draw.ellipse((x-radius, y-radius, x+radius, y+radius), fill=noise_color)
    background_f = background_f.filter(ImageFilter.GaussianBlur(radius=1)) # 점 blur
    result_image = Image.blend(resized_img, background_f, alpha=0.1)
    return result_image, new_vertices

def spot_pepper(img, vertices):  # 몇몇 위치에 집중적으로 점 찍기
    resized_img, new_vertices = img, vertices
    # resized_img, new_vertices = resize_img(img, vertices, 2048)
    resized_width, resized_height = resized_img.size

    num_spot_choices = [80, 100, 200]
    num_spot = random.choice(num_spot_choices)
    dot_radius = 1
    noise_color = (150, 150, 150)

    draw = ImageDraw.Draw(resized_img)
    for _ in range(num_spot): # 전체
        max_point = random.choice([5, 10, 20])
        x = random.randint(max_point, resized_width - max_point)
        y = random.randint(max_point, resized_height - max_point)
        num_noise_points = random.randint(5, 30)
        for _ in range(num_noise_points):
            nx = random.randint(x, x + max_point)
            ny = random.randint(y - max_point, y + max_point)
            draw.ellipse((nx - dot_radius, ny - dot_radius, nx + dot_radius, ny + dot_radius), fill=noise_color)

    for _ in range(20): # 윗변
        max_point = random.choice([5, 10, 20])
        x = random.randint(max_point, resized_width - max_point)
        y = random.randint(max_point, max_point + 30)
        num_noise_points = random.randint(5, 30)
        for _ in range(num_noise_points):
            nx = random.randint(x, x + max_point)
            ny = random.randint(y - max_point, y + max_point)
            draw.ellipse((nx - dot_radius, ny - dot_radius, nx + dot_radius, ny + dot_radius), fill=noise_color)

    for _ in range(30):  # 왼쪽
        max_point = random.choice([5, 10, 20])
        x = random.randint(max_point, max_point + 50)
        y = random.randint(max_point, resized_height - max_point)
        num_noise_points = random.randint(5, 30)
        for _ in range(num_noise_points):
            nx = random.randint(x, x + max_point)
            ny = random.randint(y - max_point, y + max_point)
            draw.ellipse((nx - dot_radius, ny - dot_radius, nx + dot_radius, ny + dot_radius), fill=noise_color)

    for _ in range(20): #아래
        max_point = random.choice([5, 10, 20])
        x = random.randint(max_point, resized_width - max_point)
        y = random.randint(resized_height - max_point - 50, resized_height - max_point)
        num_noise_points = random.randint(5, 30)
        for _ in range(num_noise_points):
            nx = random.randint(x, x + max_point)
            ny = random.randint(y - max_point, y + max_point)
            draw.ellipse((nx - dot_radius, ny - dot_radius, nx + dot_radius, ny + dot_radius), fill=noise_color)

    for _ in range(30):  # 오른쪽
        max_point = random.choice([5, 10, 20])
        x = random.randint(resized_width - max_point - 50, resized_width - max_point)
        y = random.randint(max_point, resized_height - max_point)
        num_noise_points = random.randint(5, 30)
        for _ in range(num_noise_points):
            nx = random.randint(x, x + max_point)
            ny = random.randint(y - max_point, y + max_point)
            draw.ellipse((nx - dot_radius, ny - dot_radius, nx + dot_radius, ny + dot_radius), fill=noise_color)
    return resized_img, new_vertices

def gaussianblur(img, vertices):
    blurred_img = img.filter(ImageFilter.GaussianBlur(radius=1))
    return blurred_img, vertices
class SceneTextDataset(Dataset):
    def __init__(self, root_dir,
                 split='train',
                 image_size=2048,
                 crop_size=1024,
                 ignore_tags=[],
                 ignore_list=[], # 무시할 파일명을 받아온다.
                 ignore_under_threshold=10,
                 drop_under_threshold=1,
                 color_jitter=True,
                 normalize=True):
        with open(osp.join(root_dir, 'ufo/{}.json'.format(split)), 'r') as f:
            anno = json.load(f)

        self.anno = anno
        self.image_fnames = sorted(anno['images'].keys())
        self.image_dir = osp.join(root_dir, 'img', split)

        self.image_size, self.crop_size = image_size, crop_size
        self.color_jitter, self.normalize = color_jitter, normalize

        self.ignore_tags = ignore_tags
        self.ignore_list = ignore_list  # train.py에서 무시할 파일명을 받아온다.

        self.drop_under_threshold = drop_under_threshold
        self.ignore_under_threshold = ignore_under_threshold

    def __len__(self):
        return len(self.image_fnames)

    def __getitem__(self, idx):
        image_fname = self.image_fnames[idx]
        image_fpath = osp.join(self.image_dir, image_fname)

        if image_fpath in self.ignore_list or image_fname[:5] == 'image':
            apply_augmentation = False #여기서 조건과 파일명이 동일하다면 augmentation을 하지 않는다.
        else:
            apply_augmentation = True

        vertices, labels = [], []
        for word_info in self.anno['images'][image_fname]['words'].values():
            word_tags = word_info['tags']

            ignore_sample = any(elem for elem in word_tags if elem in self.ignore_tags)
            num_pts = np.array(word_info['points']).shape[0]

            # skip samples with ignore tag and
            # samples with number of points greater than 4
            if ignore_sample or num_pts > 4:
                continue

            vertices.append(np.array(word_info['points']).flatten())
            labels.append(int(not word_info['illegibility']))
        vertices, labels = np.array(vertices, dtype=np.float32), np.array(labels, dtype=np.int64)

        vertices, labels = filter_vertices(
            vertices,
            labels,
            ignore_under=self.ignore_under_threshold,
            drop_under=self.drop_under_threshold
        )

        image = Image.open(image_fpath)
        random_num = np.random.rand() # 조건을 추가해서 여러 augmentation중 하나만 적용.
        image, vertices = resize_img(image, vertices, self.image_size)
        if apply_augmentation:
            # if random_num > 0.95:
            #     image, vertices = move_pepper_noise(image, vertices)
            if random_num > 0.9:
                image, vertices = pepper_noise(image, vertices)
            elif random_num > 0.8 and random_num <= 0.9:
                image, vertices = gaussianblur(image, vertices)
            elif random_num > 0.6  and random_num <= 0.8:
                image, vertices = spot_pepper(image, vertices)
        image, vertices = adjust_height(image, vertices)
        image, vertices = rotate_img(image, vertices, angle_range=5)
        image, vertices = crop_img(image, vertices, labels, self.crop_size)

        if image.mode != 'RGB': # RGB가 아닐 때 바꿔주는 것은 아주 중요하다 !
            image = image.convert('RGB')
        image = np.array(image)

        funcs = [] # 여기서 1.5 : RandomBrightnessContrast을 적용한다.
        if self.color_jitter and random_num > 0.5  and random_num <= 0.6 and apply_augmentation:
            funcs.append(A.RandomBrightnessContrast((0.3,0.5),(-0.3,-0.2), always_apply=True))
        if self.normalize: # 흔히 사용되는 RGB 의 meam, std 값을 사용했다.
            funcs.append(A.Normalize(mean=(0.485, 0.456, 0.406), std=(0.229, 0.224, 0.225)))
        transform = A.Compose(funcs)

        image = transform(image=image)['image']
        word_bboxes = np.reshape(vertices, (-1, 4, 2))
        roi_mask = generate_roi_mask(image, vertices, labels)

        return image, word_bboxes, roi_mask
여기서 move_pepper_noise는 훈련 당시 너무 강한 augmentation이어서그런지 훈련이 converge되지 않아서 그냥 빼버렸다.
이제 저 코드가 어떤식으로 이미지를 바꾸는지 시연만 보고 가자. 저작권 문제 때문에 train set을 가져오지 않고 딴 이미지를 가져와서 보는 게 좋을 것같다.
원본이미지와 사용할 모듈의 정보는 다음과 같다.
영수증 이미지는 가져올 수 없기 때문에 대충 세로로 긴 롱스톤 가져와서 보자.
from PIL import Image, ImageDraw, ImageFilter
import random

img = Image.open('./long.jpg')
img
1.1 move_pepper_noise 미리보기
def resize_img(img, size):  # 대충 구현하려면 annotation정보는 빼고 img만 변형시켜보자
    h, w = img.height, img.width
    ratio = size / max(h, w)
    if w > h:
        img = img.resize((size, int(h * ratio)), Image.BILINEAR)
    else:
        img = img.resize((int(w * ratio), size), Image.BILINEAR)

    if img.mode != 'RGB':
        img = img.convert('RGB')

    return img

def move_pepper_noise(img):  # 뒷배경과 pepper 노이즈 추가
    resized_img = resize_img(img, 2048)
    new_width, new_height = int(resized_img.size[0]*1.1), int(resized_img.size[1]*1.5) # 뒷배경 생성
    background_b = Image.new('RGB', (new_width, new_height), (255, 255, 255))
    background_f = Image.new('RGB', (new_width, new_height), (255, 255, 255))

    # 원본 이미지를 뒷배경에 추가
    max_x = new_width - resized_img.size[0]
    max_y = new_height - resized_img.size[1]
    random_x = random.randint(0, max_x)
    random_y = random.randint(0, max_y)
    background_b.paste(resized_img, (random_x, random_y))

    # pepper 노이즈 추가
    num_noise_points = 60000  # 점의 개수
    noise_color = (0, 0, 0)  # 검정색

    draw = ImageDraw.Draw(background_f)
    for _ in range(num_noise_points):
        x = random.randint(0, new_width)
        y = random.randint(0, new_height)
        noise_color = (0, 0, 0)
        radius = random.randint(1, 3)
        draw.ellipse((x-radius, y-radius, x+radius, y+radius), fill=noise_color)
    background_f = background_f.filter(ImageFilter.GaussianBlur(radius=1)) # 점 blur
    result_image = Image.blend(background_b, background_f, alpha=0.1)

    return result_image
move_pepper_noise(img)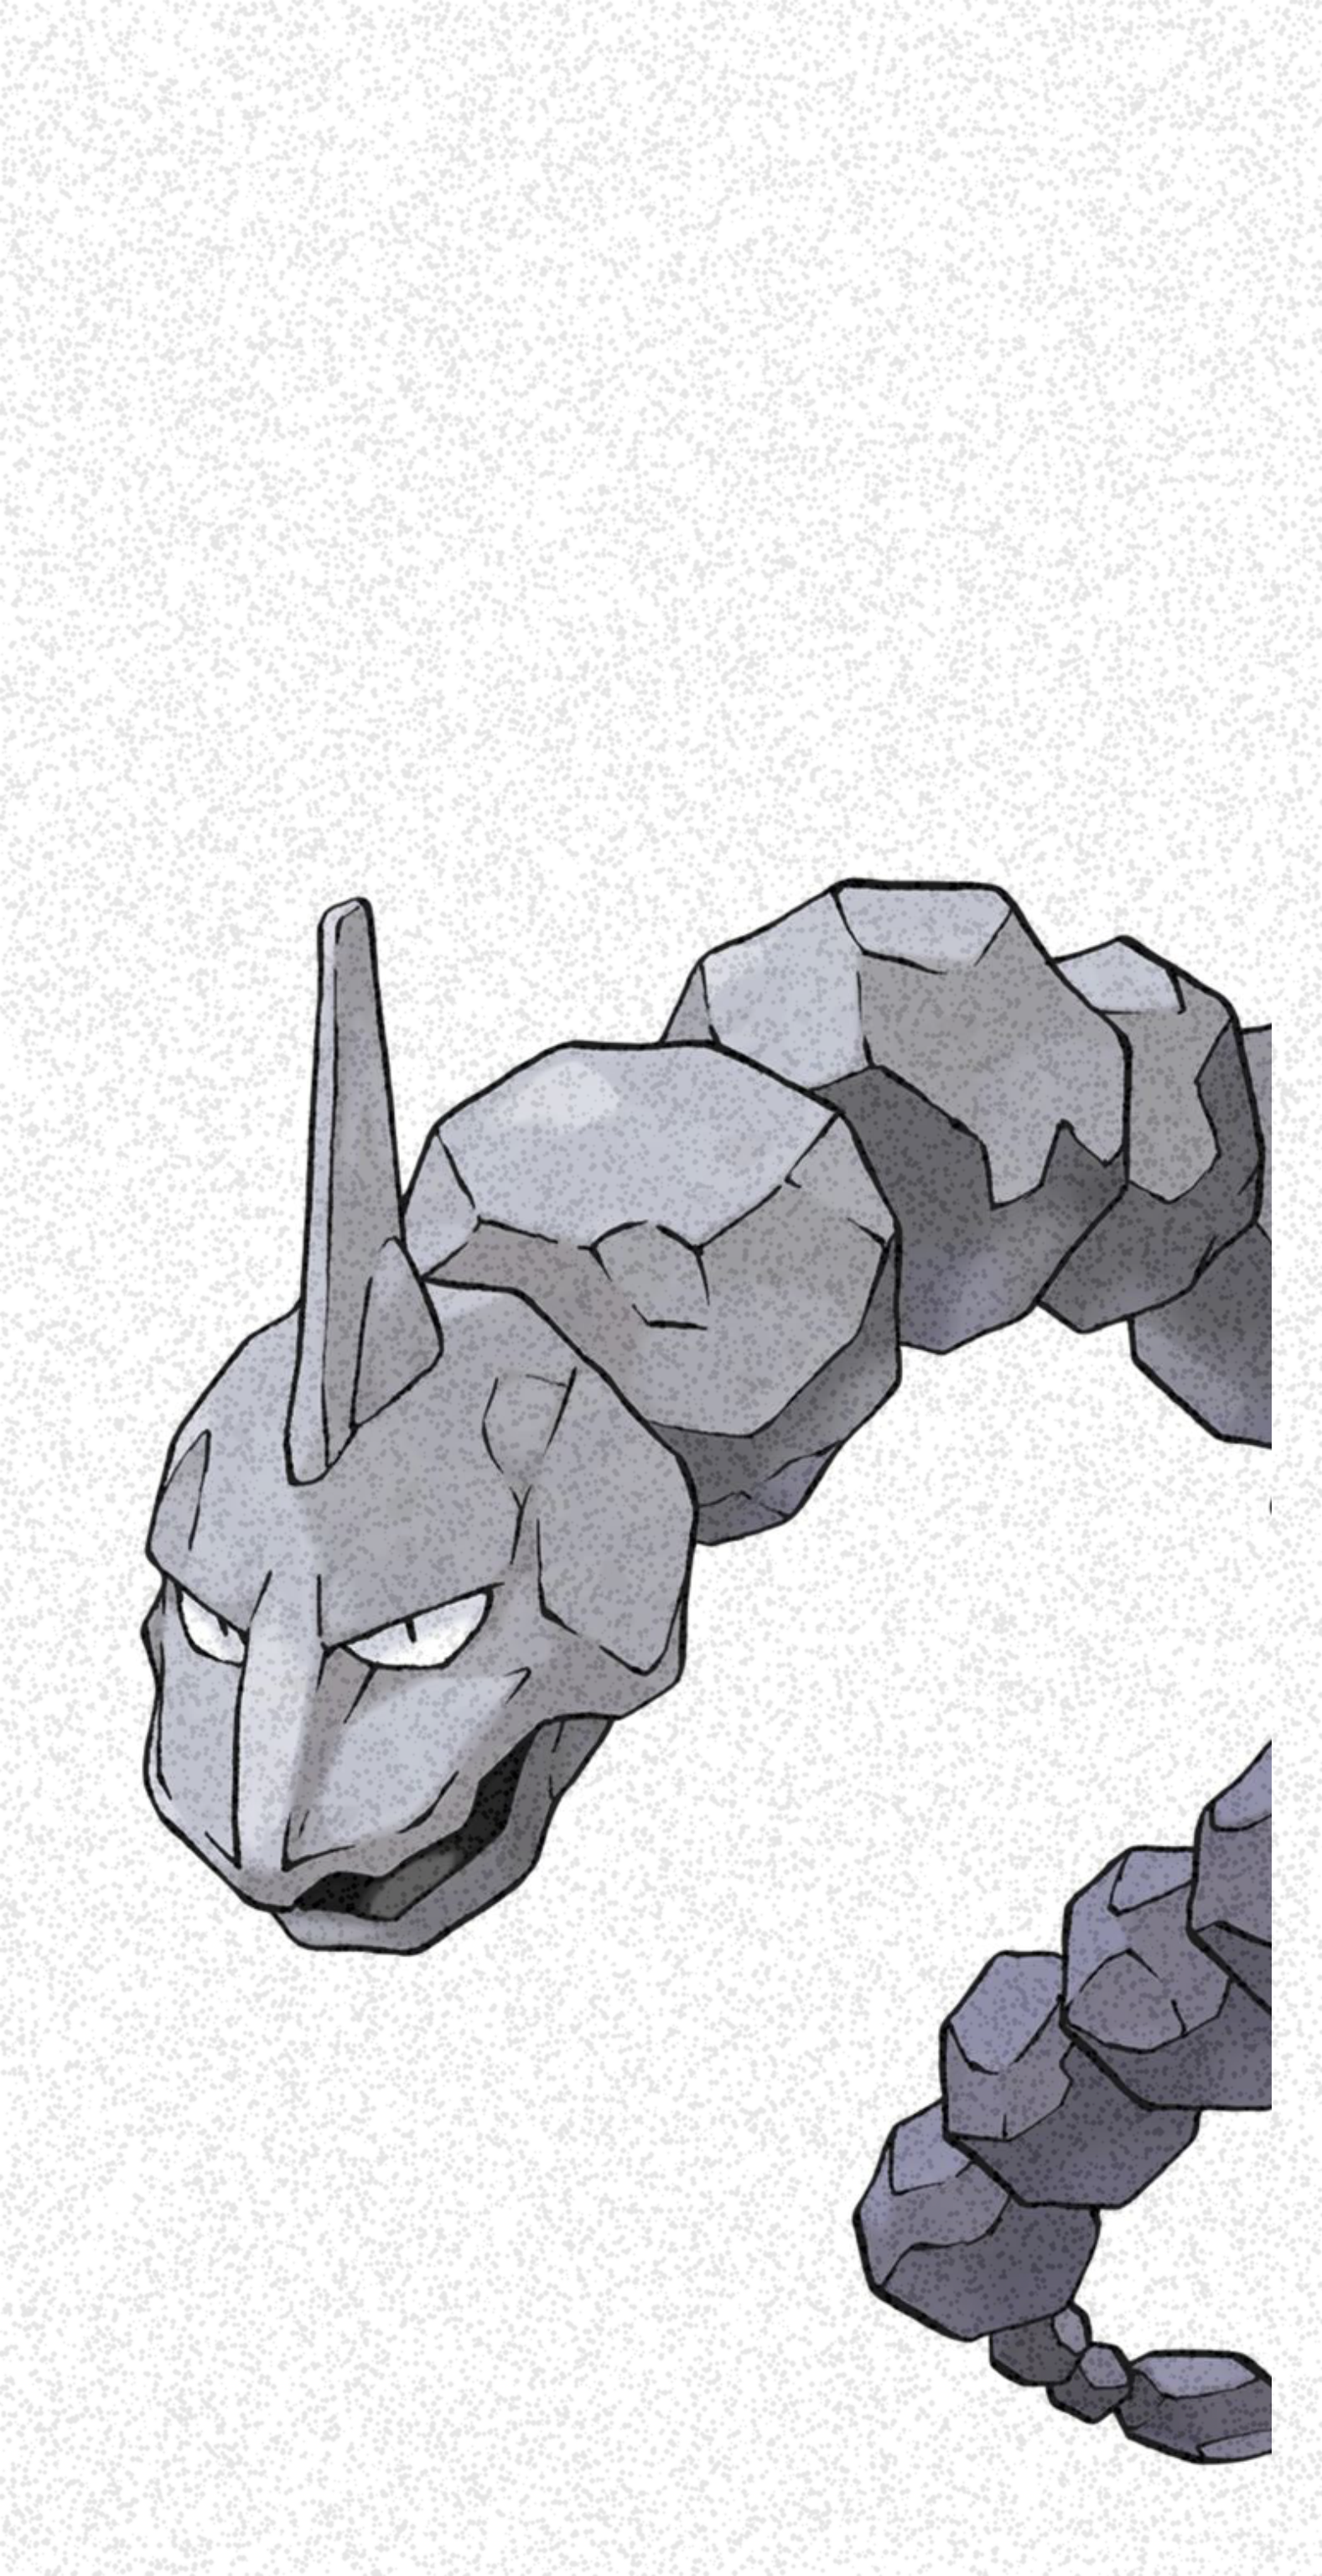
> 원본 이미지와 앞 뒤 코팅을 할 배경 2개를 준비한다(background_f, background_b)
> 흰 배경의 background_b를 원본 이미지보다 세로를 길게 설정하여 생성한 뒤
원본 이미지를 background_b 위를 벗어나지 않는 랜덤한 위치에 배정한 뒤 paste로 background_b와 합친다.
> background_f를 background_b와 동일한 사이즈로 생성한 뒤 점을 찍고 Gaussian Blur를 줘서 점의 경계를 흐리게 하고, > background_f에투명도를 줘서 점이 선명하지 않게 만든다.
> background_b위에 background_f를 blend로 합치면서 한 장의 이미지로 만든다.
1.2 pepper_noise 미리보기
resize_img 함수는 위와 동일하다.
def pepper_noise(img): # pepper 노이즈 추가
    resized_img = resize_img(img, 2048)
    # pepper 추가
    num_noise_points = 30000  # 점의 개수
    noise_color = (0, 0, 0)  # 검정색
    resized_width, resized_height = resized_img.size
    background_f = Image.new('RGB', (resized_width, resized_height), (255, 255, 255))
    draw = ImageDraw.Draw(background_f)
    for _ in range(num_noise_points):
        x = random.randint(0, resized_width)
        y = random.randint(0, resized_height)
        noise_color = (0, 0, 0)
        radius = random.randint(1, 5)
        draw.ellipse((x-radius, y-radius, x+radius, y+radius), fill=noise_color)
    background_f = background_f.filter(ImageFilter.GaussianBlur(radius=1)) # 점 blur
    result_image = Image.blend(resized_img, background_f, alpha=0.1)
    return result_image

pepper_noise(img)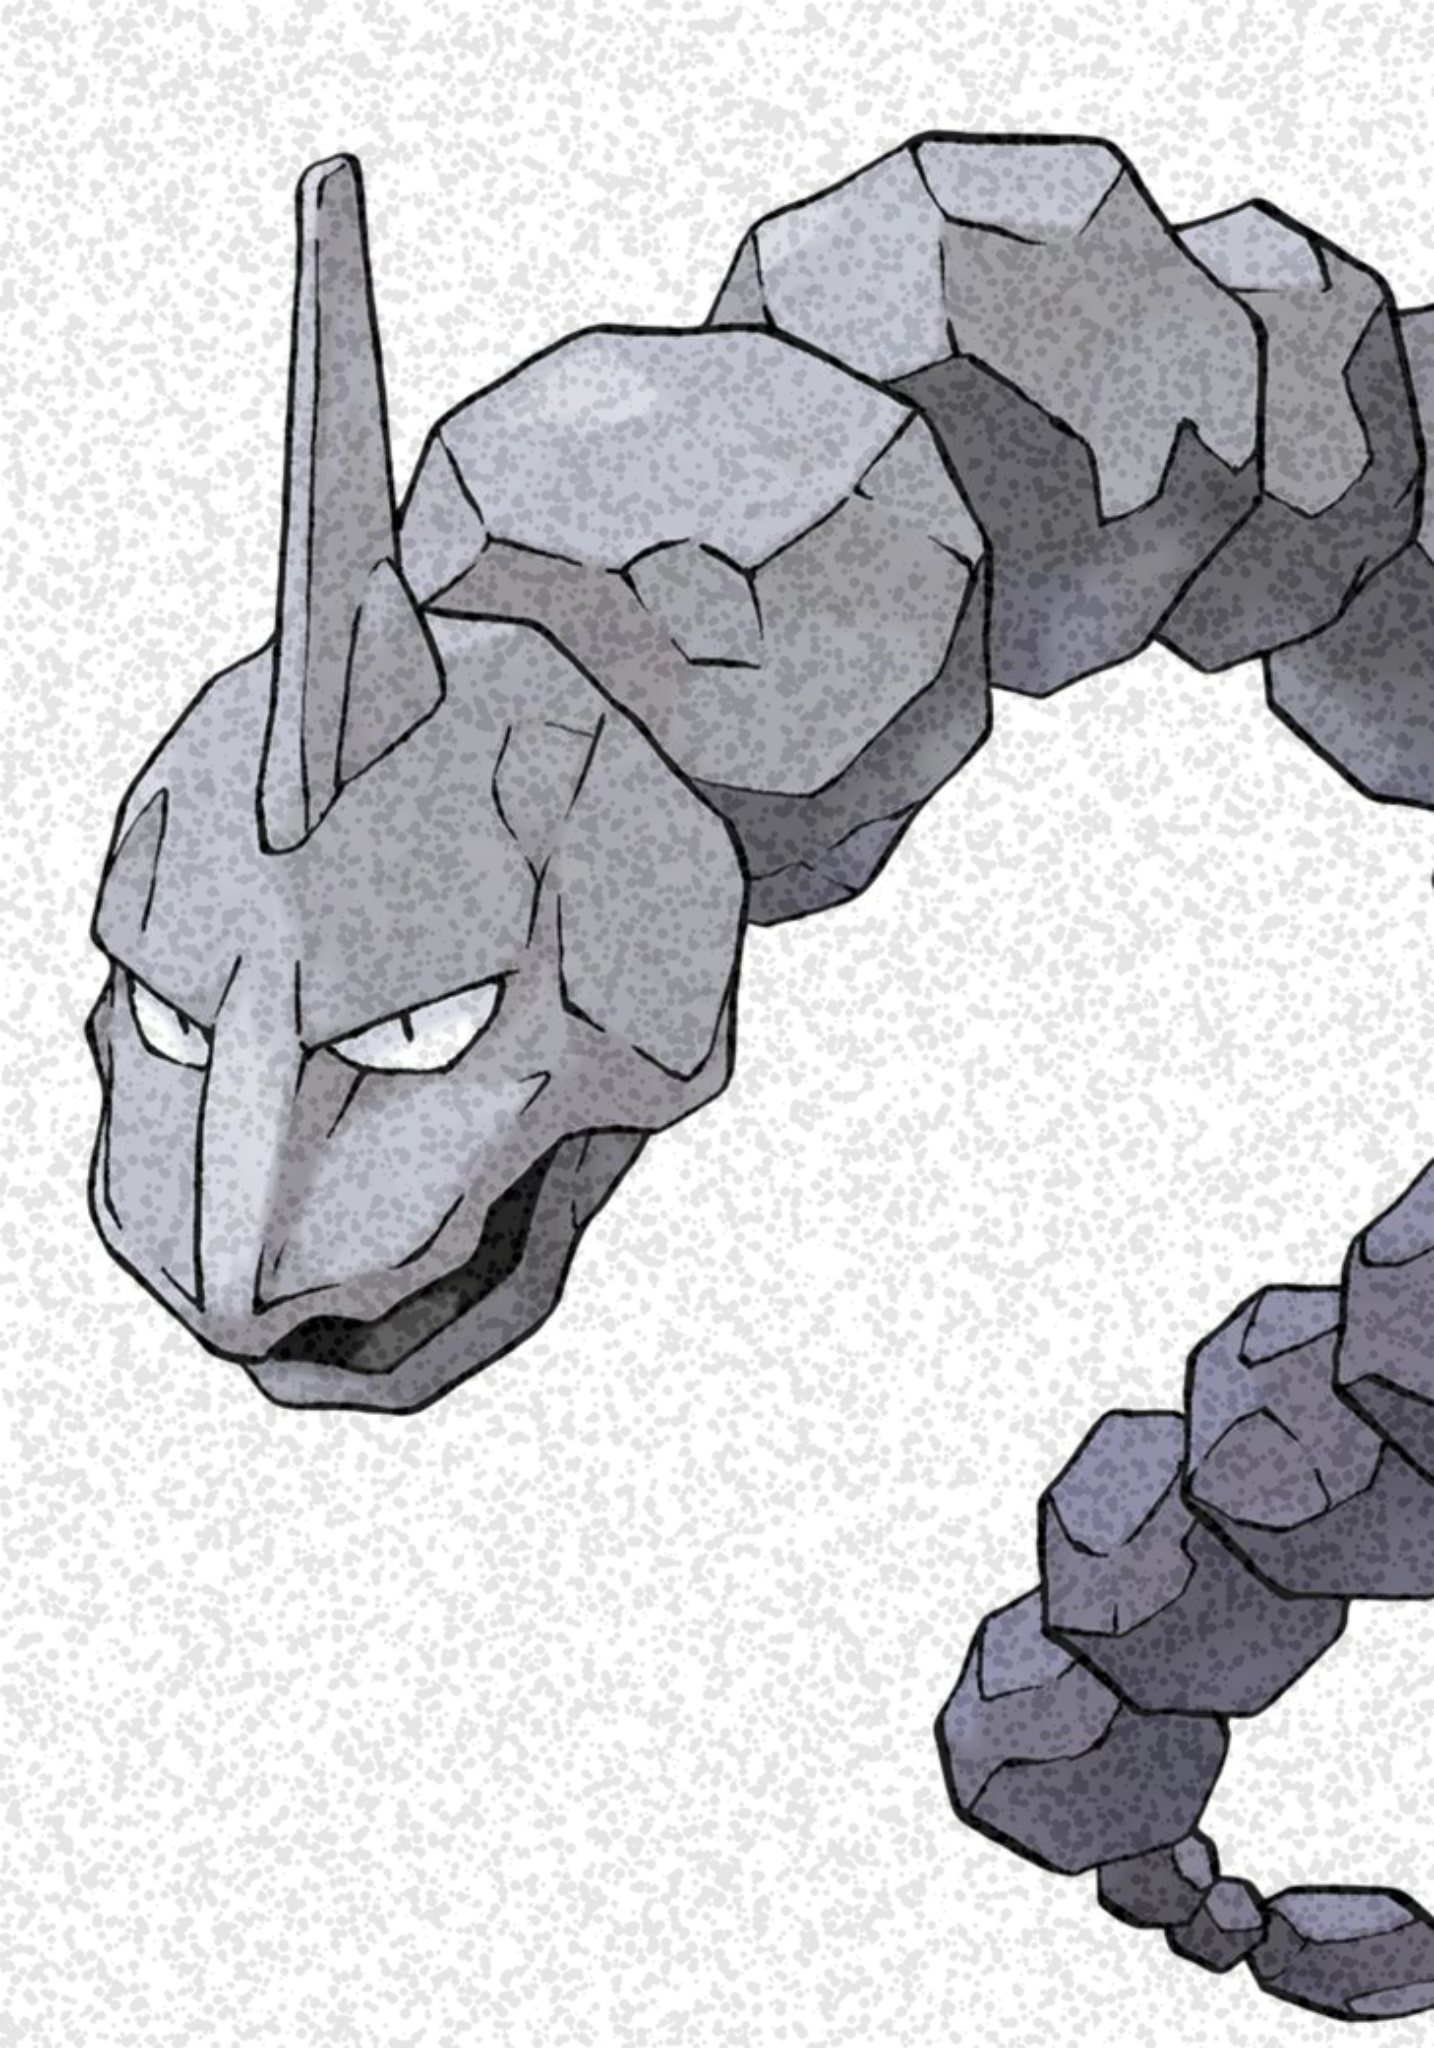
이렇게 이미지 사이즈는 동일하게 점만 찍힌 이미지가 만들어진다.
점을 찍는 방법은 1.1 move_pepper_noise와 동일하다.
1.3 spot_pepper_noise 미리보기
def spot_pepper(img):  # 몇몇 위치에 집중적으로 점 찍기

    resized_img = resize_img(img, 2048)
    resized_width, resized_height = resized_img.size

    num_spot_choices = [80, 100, 200] # 군집의 개수
    num_spot = random.choice(num_spot_choices)
    dot_radius = 1 # 점 반지름
    noise_color = (100, 100, 100) # 점 색깔

    draw = ImageDraw.Draw(resized_img)
    for _ in range(num_spot): # 전체
        max_point = random.choice([5, 10, 20]) # 군집의 범위
        x = random.randint(max_point, resized_width - max_point) # 점 위치가 이미지를 벗어나지 않게
        y = random.randint(max_point, resized_height - max_point)
        num_noise_points = random.randint(5, 30) # 한 군집에서의 점의 개수
        for _ in range(num_noise_points):
            nx = random.randint(x, x + max_point)
            ny = random.randint(y - max_point, y + max_point)
            draw.ellipse((nx - dot_radius, ny - dot_radius, nx + dot_radius, ny + dot_radius), fill=noise_color)

    for _ in range(20): # 윗변
        max_point = random.choice([5, 10, 20])
        x = random.randint(max_point, resized_width - max_point)
        y = random.randint(max_point, max_point + 30)
        num_noise_points = random.randint(5, 30)
        for _ in range(num_noise_points):
            nx = random.randint(x, x + max_point)
            ny = random.randint(y - max_point, y + max_point)
            draw.ellipse((nx - dot_radius, ny - dot_radius, nx + dot_radius, ny + dot_radius), fill=noise_color)

    for _ in range(30):  # 왼쪽
        max_point = random.choice([5, 10, 20])
        x = random.randint(max_point, max_point + 50)
        y = random.randint(max_point, resized_height - max_point)
        num_noise_points = random.randint(5, 30)
        for _ in range(num_noise_points):
            nx = random.randint(x, x + max_point)
            ny = random.randint(y - max_point, y + max_point)
            draw.ellipse((nx - dot_radius, ny - dot_radius, nx + dot_radius, ny + dot_radius), fill=noise_color)

    for _ in range(20): #아래
        max_point = random.choice([5, 10, 20])
        x = random.randint(max_point, resized_width - max_point)
        y = random.randint(resized_height - max_point - 50, resized_height - max_point)
        num_noise_points = random.randint(5, 30)
        for _ in range(num_noise_points):
            nx = random.randint(x, x + max_point)
            ny = random.randint(y - max_point, y + max_point)
            draw.ellipse((nx - dot_radius, ny - dot_radius, nx + dot_radius, ny + dot_radius), fill=noise_color)

    for _ in range(30):  # 오른쪽
        max_point = random.choice([5, 10, 20])
        x = random.randint(resized_width - max_point - 50, resized_width - max_point)
        y = random.randint(max_point, resized_height - max_point)
        num_noise_points = random.randint(5, 30)
        for _ in range(num_noise_points):
            nx = random.randint(x, x + max_point)
            ny = random.randint(y - max_point, y + max_point)
            draw.ellipse((nx - dot_radius, ny - dot_radius, nx + dot_radius, ny + dot_radius), fill=noise_color)
    return resized_img

spot_pepper(img)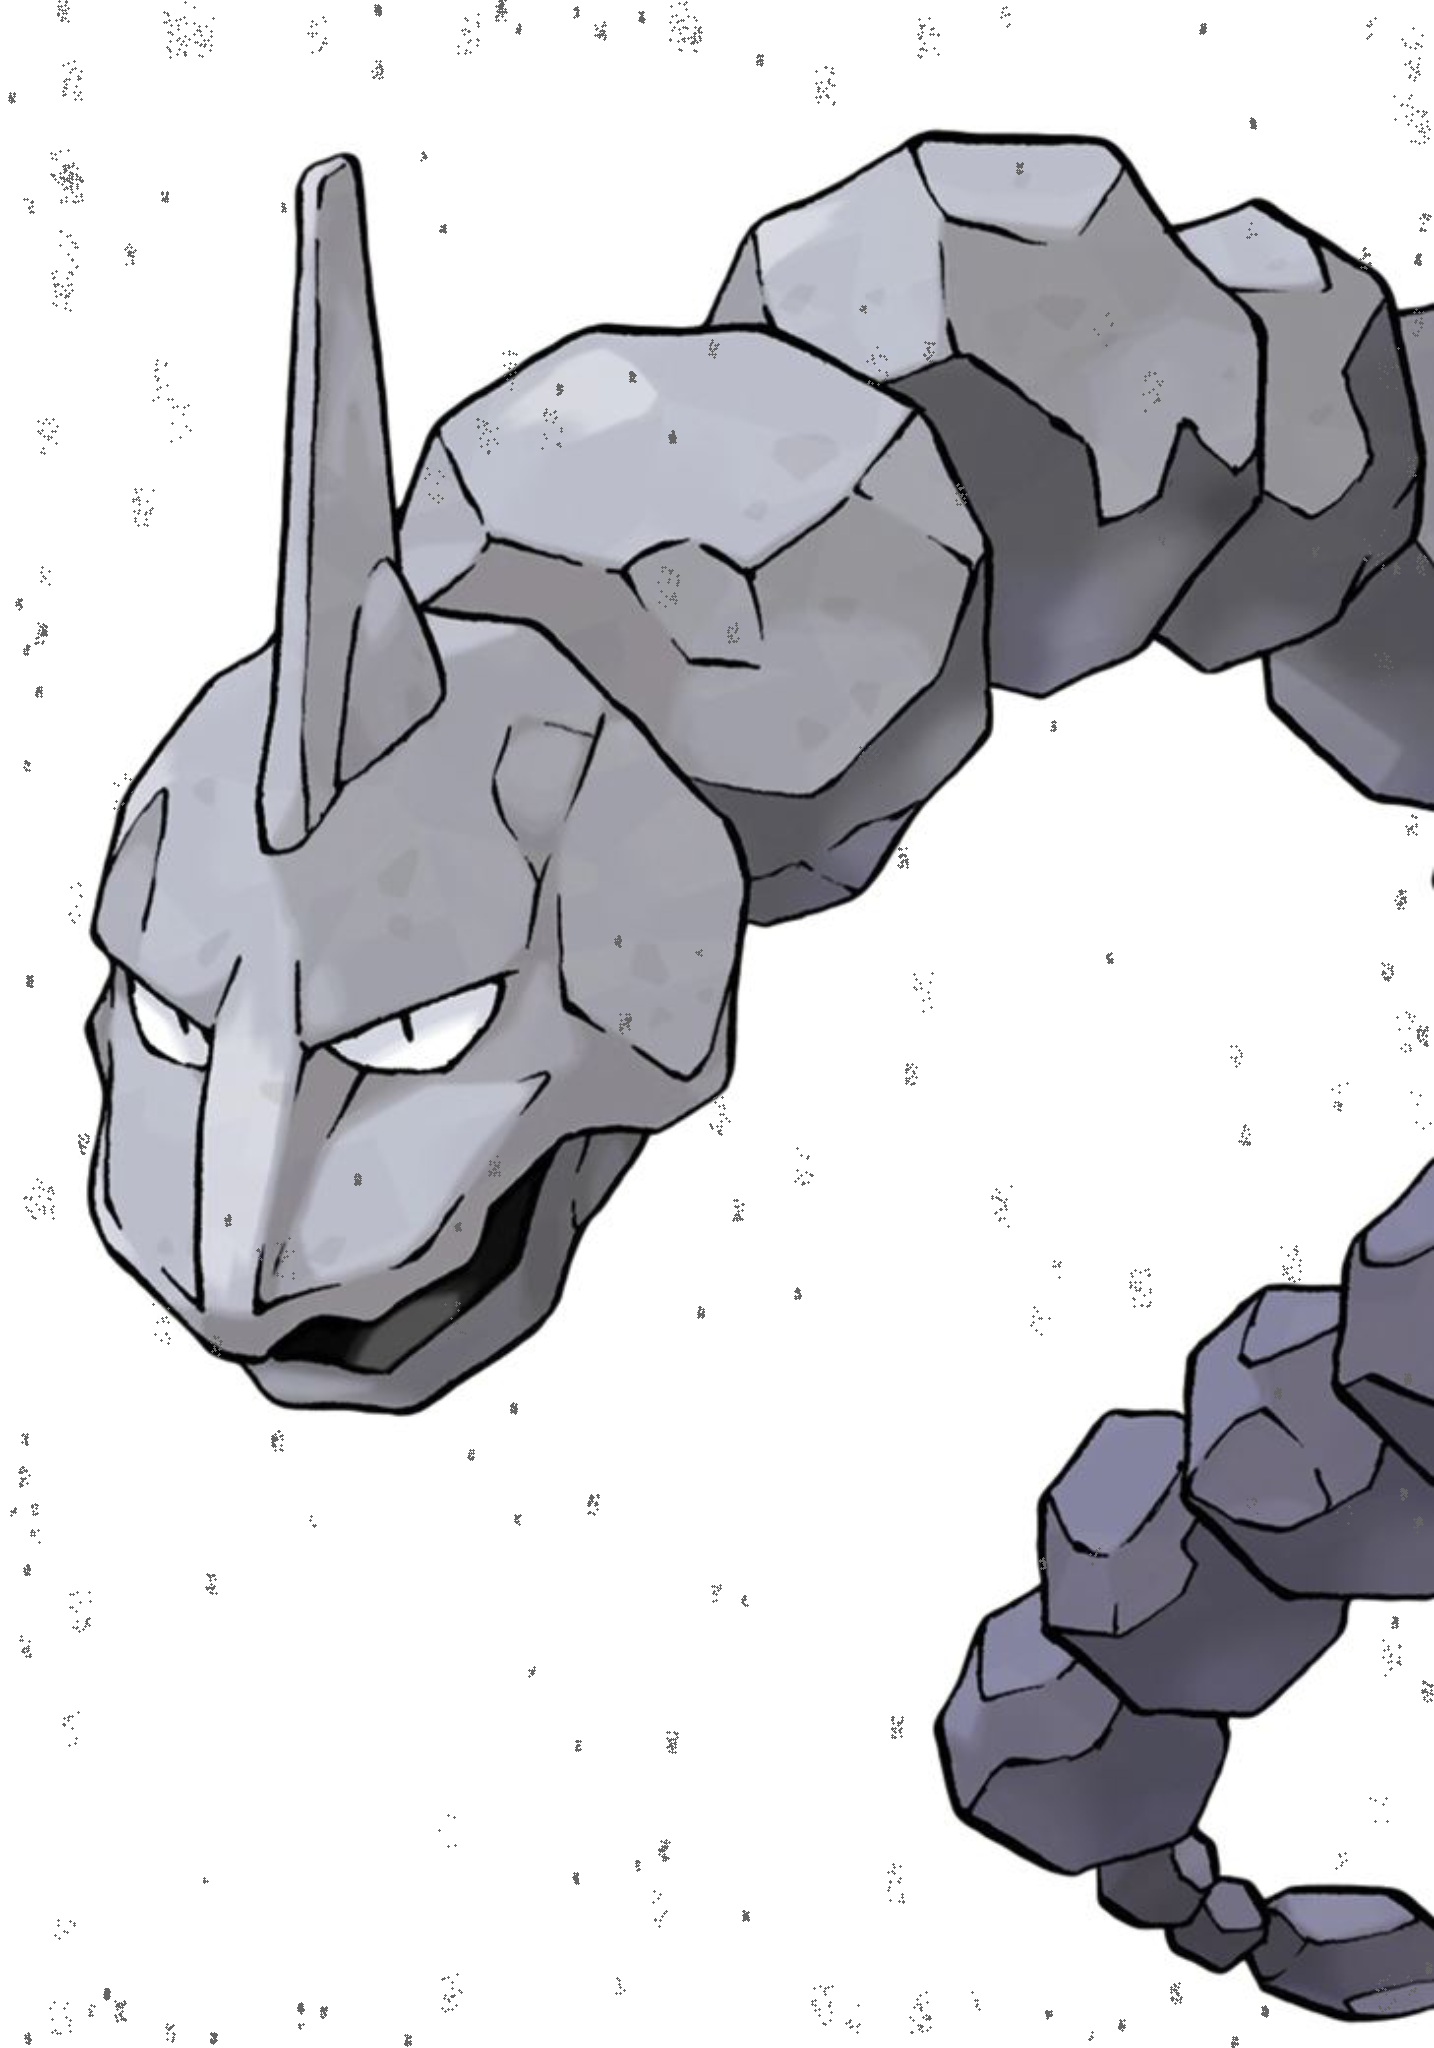
test set을 전수조사하다가 발견한 사실인데, 점이 빼곡하게 찍혀있는 곳에서
점의 군집이 글자보다 크면 인식하지않고,
점의 군집이 글자 사이즈면 인식한다. 그래서 max_point 변수를 이용해서 글자 사이즈와 비슷하거나 작은 군집의 사이즈를 만들었다.

이전보다는 양호해졌지만, 글씨 크기와 비슷한 경우에는 여전히 많이 인식한다.
한편 이런 노이즈를보고 fax noise(?) faxify(?) 이런 노이즈 이활석 마스터님께서 현업에서 많이 쓰인다고 언급해주셨다.
아직 어떤 라이브러리에서 제공하는 노이즈인지 찾지 못 했지만 기억해둘만한 키워드다.
군집 내의 점 노이즈를
nx = random.randint(x, x + max_point)
ny = random.randint(y - max_point, y + max_point) 이렇게 줘서, 세로 영역이 가로보다 2배 넓어지게 글자와 비슷한 사이즈로 만들었지만 오히려 sentence처럼 가로로 길게 늘여놓은 점으로는 훈련효과가 크지 않을까 생각은 해봤다.
하지만 시간 부족으로 실험은 못 해봤다.
또한 점 군집을 random한 위치에만 생성했더니 주로 중앙에 분포하는데, test set에서 잘못 예측한 bbox는 주로 테두리 부근에서 예측됐었기 때문에 테두리 위치에 점을 찍는 것을 추가했다.
test set에 bbox를 출력해봤을 땐 테두리에 bbox는 현저하게 줄어들었지만 (있긴 있다는 의미) f1 score에는 아주 미약한 상승만 있었다.
한편, 이 노이즈를 해결하기 위해 다른 팀들은 salt and pepper 노이즈를 사용했고, 91점의 높은 단일모델 점수를 얻었다고 했다. 나는 salt and pepper 노이즈는 test set의 노이즈와 다른 양상을 보인다고 생각했기에 구현만하고 실험하지 않았다. 역시 밟지 않아본 길이 아름다운 법이다.
구현과 시연을 잠깐만 보자.
1-3-1 numpy로 노가다 salt and pepper 구현
import numpy as np
from PIL import Image

def add_salt_and_pepper_noise(image, salt_prob, pepper_prob):
    noisy_image = np.array(image.copy())

    width, height = image.size

    # salt 노이즈 추가
    num_salt = int(width * height * salt_prob)
    salt_coords = [np.random.randint(0, width, num_salt), np.random.randint(0, height, num_salt)]
    noisy_image[salt_coords[1], salt_coords[0]] = 255  # Set selected pixels to white

    # pepper 노이즈 추가
    num_pepper = int(width * height * pepper_prob)
    pepper_coords = [np.random.randint(0, width, num_pepper), np.random.randint(0, height, num_pepper)]
    noisy_image[pepper_coords[1], pepper_coords[0]] = 0  # Set selected pixels to black

    return Image.fromarray(noisy_image)


salt_and_pepper_image = add_salt_and_pepper_noise(img, salt_prob=0.4, pepper_prob=0.4)

salt_and_pepper_image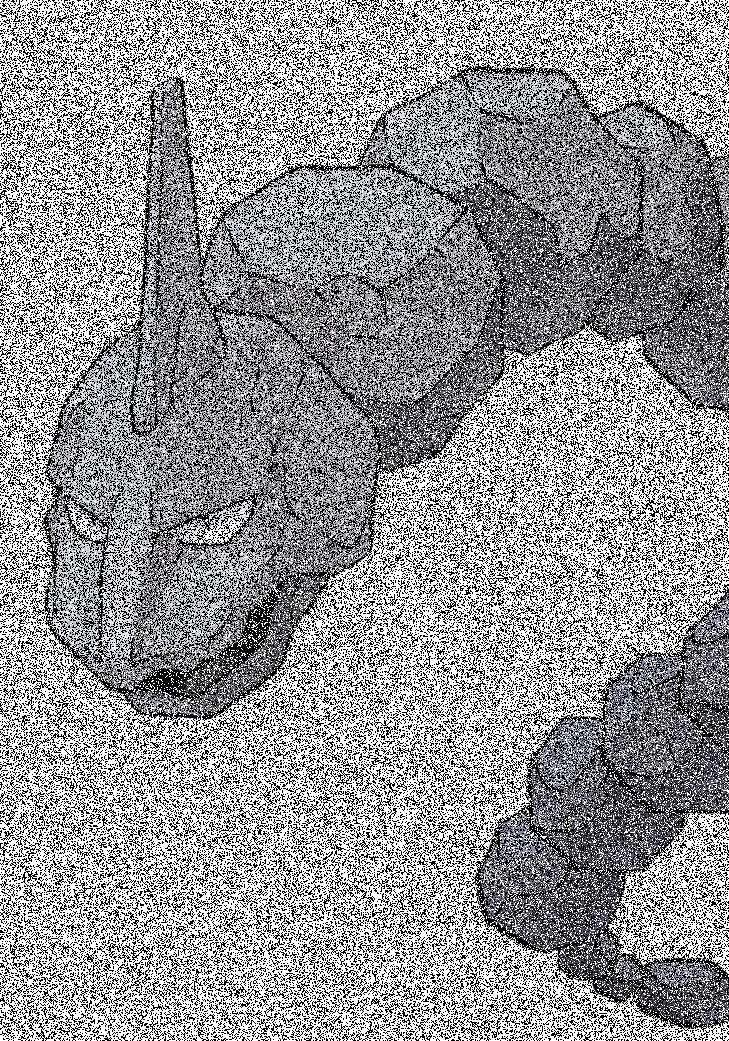
1-3-2 imgauh에서 salt and pepper 가져오기
import imgaug.augmenters as iaa
from PIL import Image
import numpy as np

img_np = np.array(img) # PIL → numpy 변환

aug = iaa.SaltAndPepper(0.5)  # 노이즈 설정 및 선언

augmented_image = aug(image=img_np) # 노이즈 적용

augmented_img_pil = Image.fromarray(augmented_image) # numpy → PIL 변환

augmented_img_pil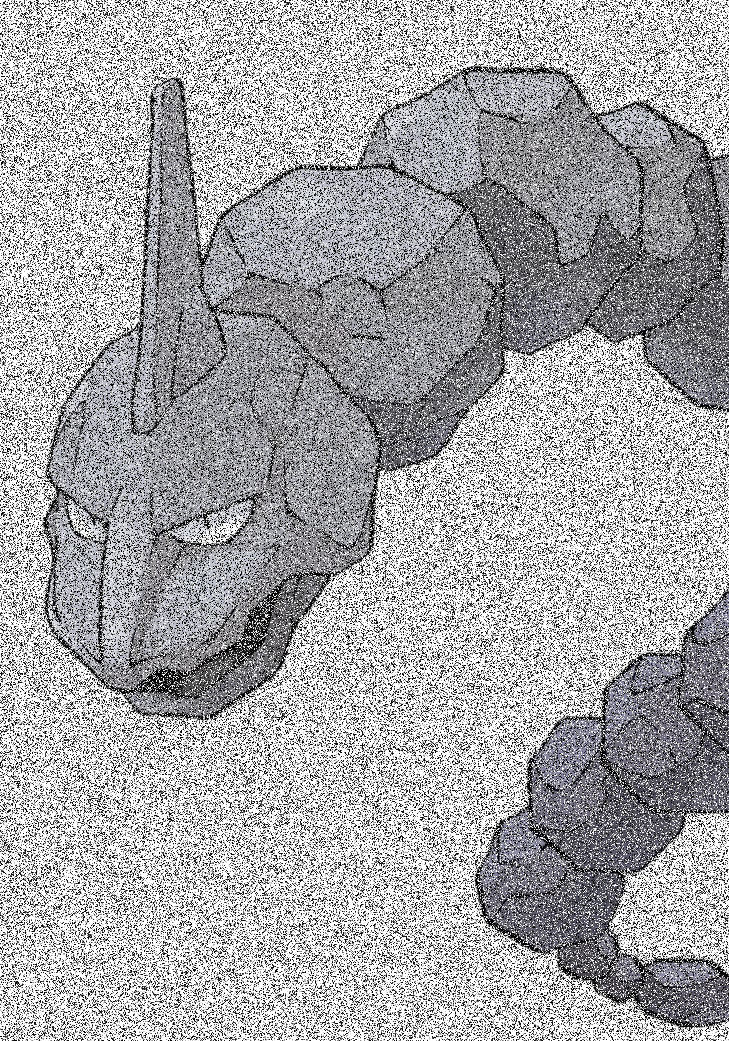
test set에서 볼 수 있었던 노이즈와 양상이 달라서 안 썼는데, 이것도 효과적이었다고 하니, 시간만 된다면 5epoch라도 훈련해보고 inference 돌려보는 게 가장 좋았을 선택인 것 같다. 이번에도 제출을 별로 못 해봐서 아쉽다.
1.4 : GaussianBlur 미리보기
def gaussianblur(img):
    blurred_img = img.filter(ImageFilter.GaussianBlur(radius=3)) # radius가 블러 값
    return blurred_img

gaussianblur(img)
1.4 : RandomBrightnessContrast 미리보기
import albumentations as A

img_np = np.array(img)

aug = A.Compose([
    A.RandomBrightnessContrast((0.3,0.5),(-0.3,-0.2), always_apply=True),  # 밝기 밝게, 채도 작게
])

augmented_image = aug(image=img_np)['image']

augmented_img_pil = Image.fromarray(augmented_image)
augmented_img_pil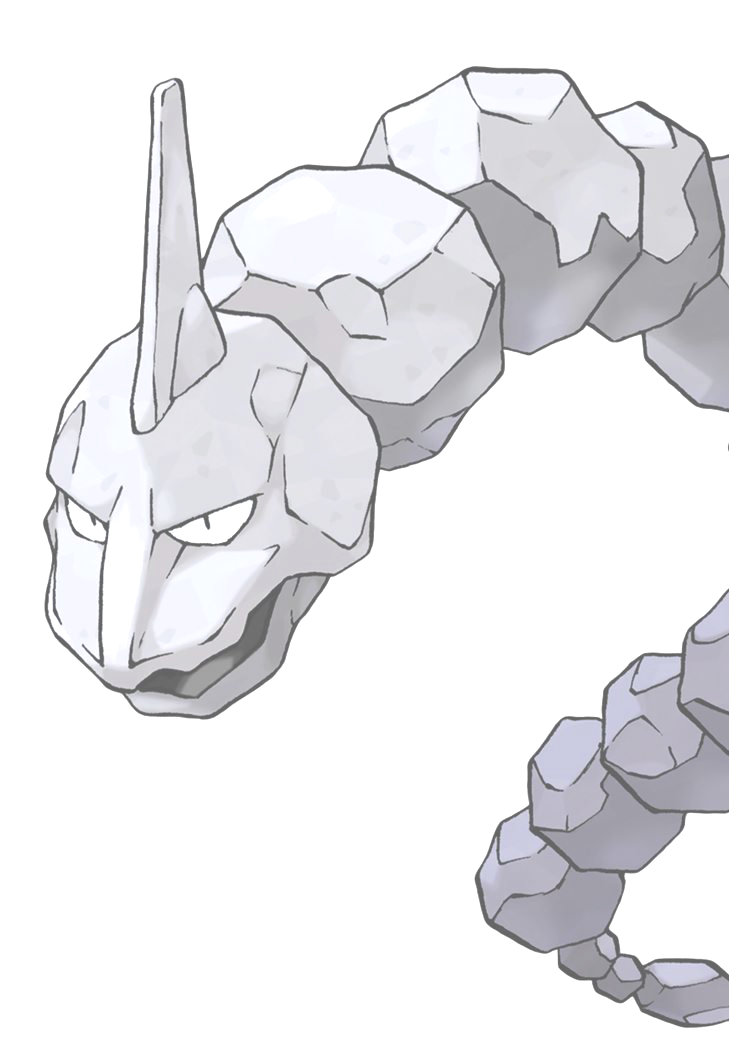
글자 중에 흐린 데이터들은 채도가 작거나 너무 밝은 데이터들이었다.
colorjitter를 사용하면 랜덤한 확률로 적용이 되기 때문에 적용되는 확률값을 직접 지정해줄 수가 없었다.
그래서 RandomBrightnessContrast 의 파라미터는 p와 always_apply가 있는데 항상 적용하게 두고 (p=1을 줘도 된다.)
image = Image.open(image_fpath)
random_num = np.random.rand() # 조건을 추가해서 여러 augmentation중 하나만 적용.
image, vertices = resize_img(image, vertices, self.image_size)
if apply_augmentation:
    # if random_num > 0.95:
    #     image, vertices = move_pepper_noise(image, vertices)
    if random_num > 0.9:
        image, vertices = pepper_noise(image, vertices)
    elif random_num > 0.8 and random_num <= 0.9:
        image, vertices = gaussianblur(image, vertices)
    elif random_num > 0.6  and random_num <= 0.8:
        image, vertices = spot_pepper(image, vertices)
image, vertices = adjust_height(image, vertices)
image, vertices = rotate_img(image, vertices, angle_range=5)
image, vertices = crop_img(image, vertices, labels, self.crop_size)

if image.mode != 'RGB':
    image = image.convert('RGB')
image = np.array(image)

funcs = []
if self.color_jitter and random_num > 0.5  and random_num <= 0.6 and apply_augmentation:
    funcs.append(A.RandomBrightnessContrast((0.3,0.5),(-0.3,-0.2), always_apply=True))
if self.normalize:
    funcs.append(A.Normalize(mean=(0.485, 0.456, 0.406), std=(0.229, 0.224, 0.225)))
transform = A.Compose(funcs)
이런 식으로 random_num을 지정하여 하나의 augmentation만 적용되도록 유도했다.
댓글